The Item ID in Infowise Ultimate Forms automatically generates custom identifiers for your list or library items. Instead of relying on the default numeric SharePoint ID, you can define meaningful, business-friendly formats that improve tracking, consistency, and automation.
Item IDs are flexible, portable, and can be configured to meet almost any organizational need, from simple numbering sequences to complex, condition-based patterns.Why Use Item IDs?
- Consistency – IDs follow the same format, avoiding manual mistakes.
- Automation – IDs are generated automatically on item creation/update.
- Flexibility – Build patterns with static text, counters, and dynamic values.
- Portability – Saved inside list templates, reusable across environments.
- Integration – Use generated IDs in workflows, approvals, and reporting.
What Kind of Item IDs Can You Create?
The flexibility of Item IDs allows you to build identifiers for almost any business process:
- Service Requests → SR-1001, SR-1002
- Purchase Orders → PO-2025-1, PO-2025-2
- Projects → PRJ-001-A, PRJ-002-A
- Contracts → CNTR-[#|500|4] → CNTR-5001, CNTR-5002
- Cases or Tickets → CASE-[Year]-[#] → CASE-2025-1
- Documents → DOC-[Department]-[#] → DOC-HR-1
IDs can include:
- Prefixes (e.g., PO, SR, PRJ)
- Counters (incremental numbers with custom starting points)
- Dates (year, month, or full date)
- Conditions (different IDs based on status or category)
Example: Service Request IDs
To see how it works in practice, let’s take a simple example: generating a Service Request ID.
We’ll create IDs in the format: SR-[#|1000|4]
This will generate IDs like:
- SR-1000
- SR-1001
- SR-1002
Step-by-Step Tutorial:
Step 1: Create the Target Column
- In your list Service Requests, add a new Single line of text column called Request ID.
- This is where the generated ID will be stored.
(The default SharePoint “ID” column cannot be overwritten.)
Step 2: Open Item ID Designer
- Go to Ultimate Forms → Business Logic → Item IDs.
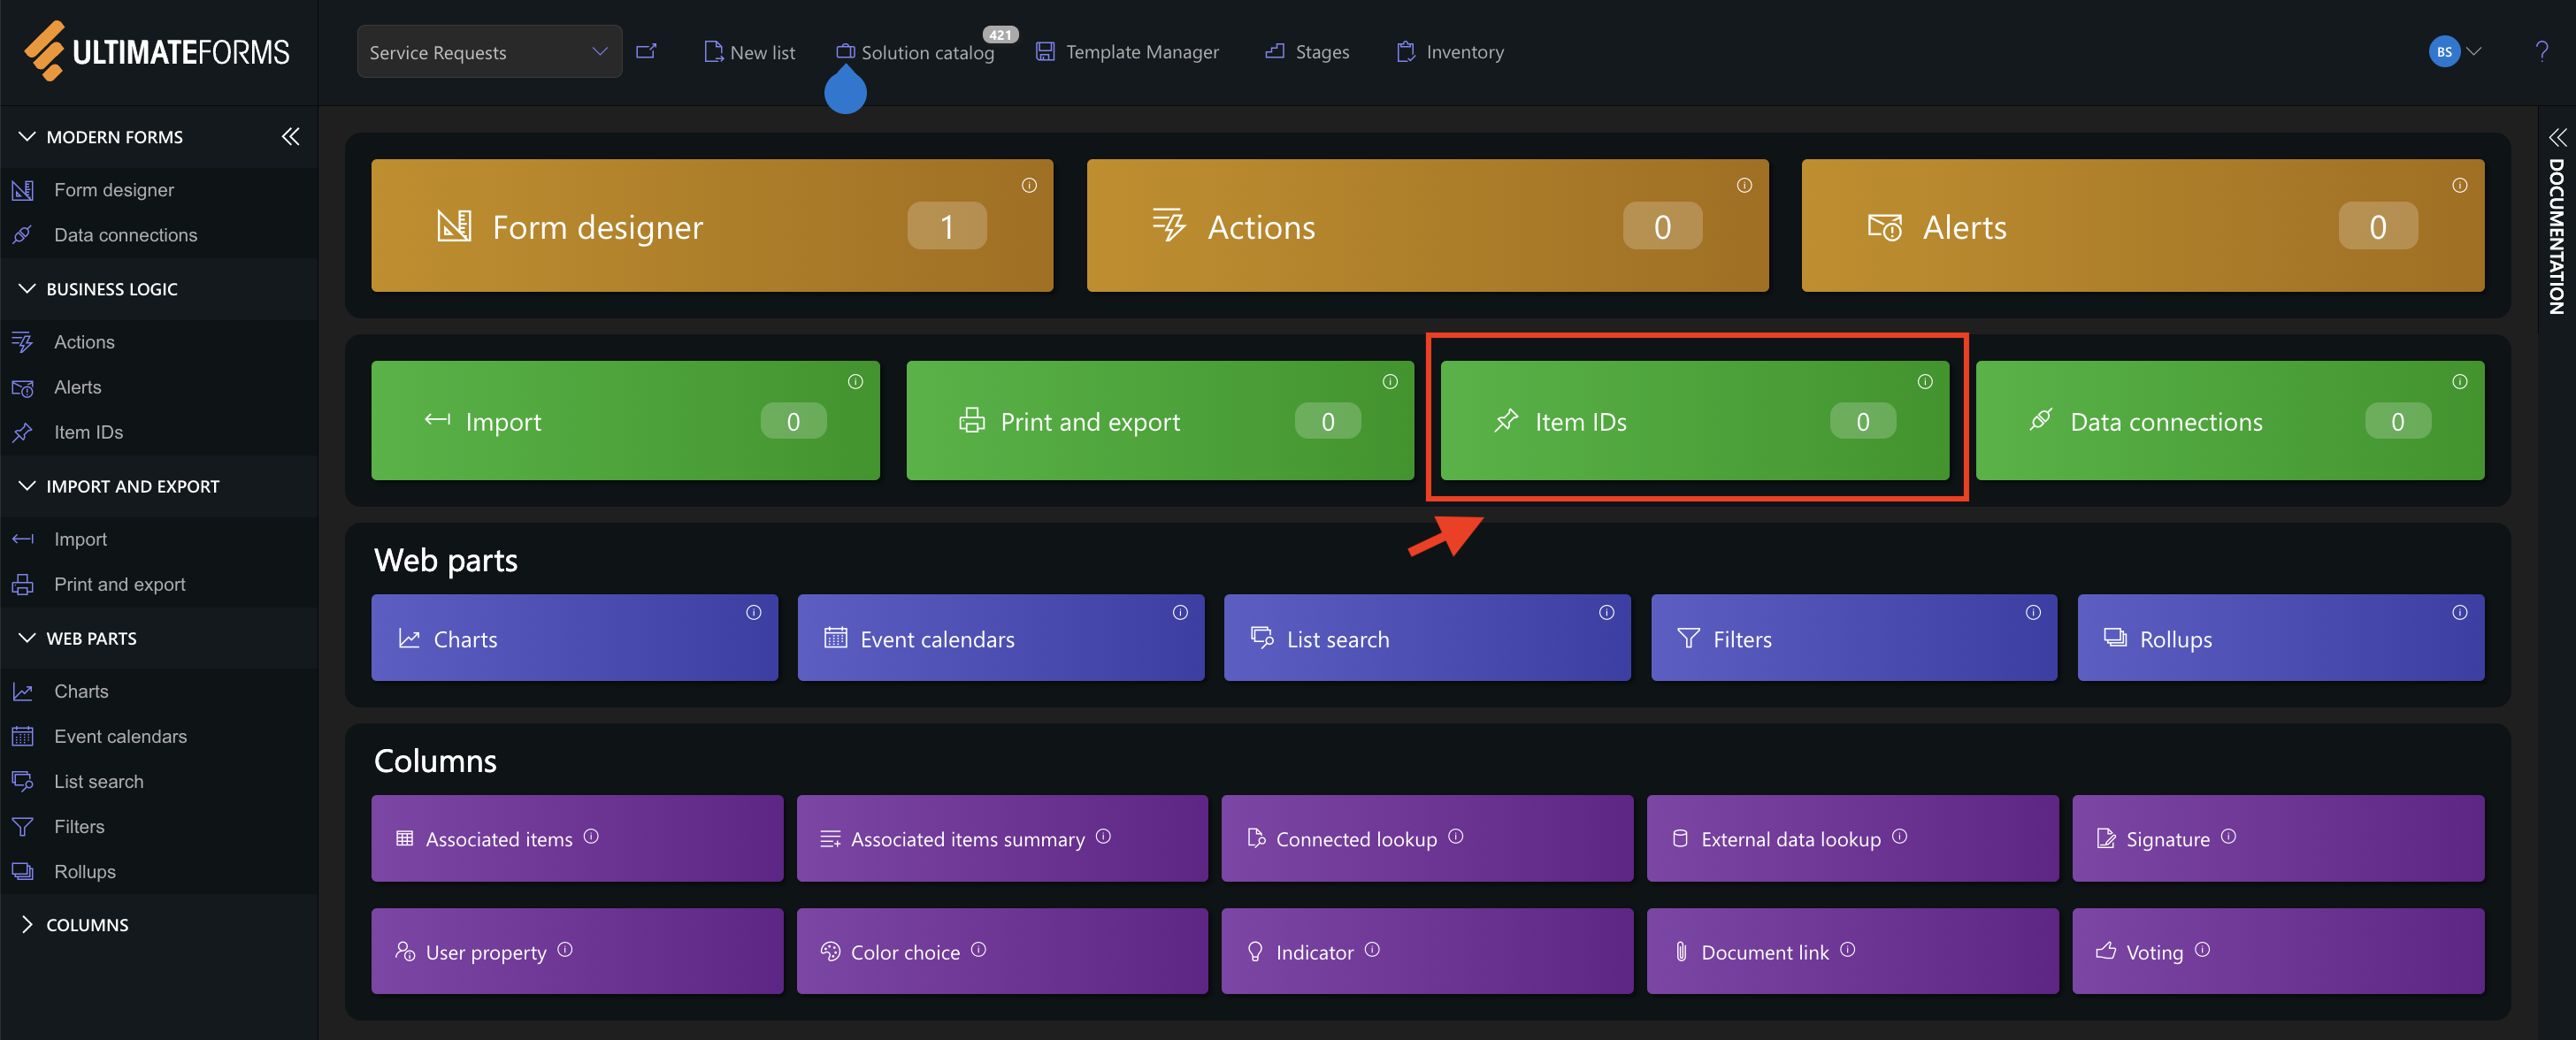
- Click Add New Profile.
Step 3: Configure the Profile
- Target Column: select Request ID.
- Trigger: set when the ID should be generated (on item creation).
- Prevent Manual Editing: enable to lock the column against user changes.
- In the Pattern, enter:
- SR-[#|1000|4]
- SR- → static prefix.
- # → counter.
- 1000 → starting seed value.
- 4 → fixed digit length (e.g., 1000, 1001…).
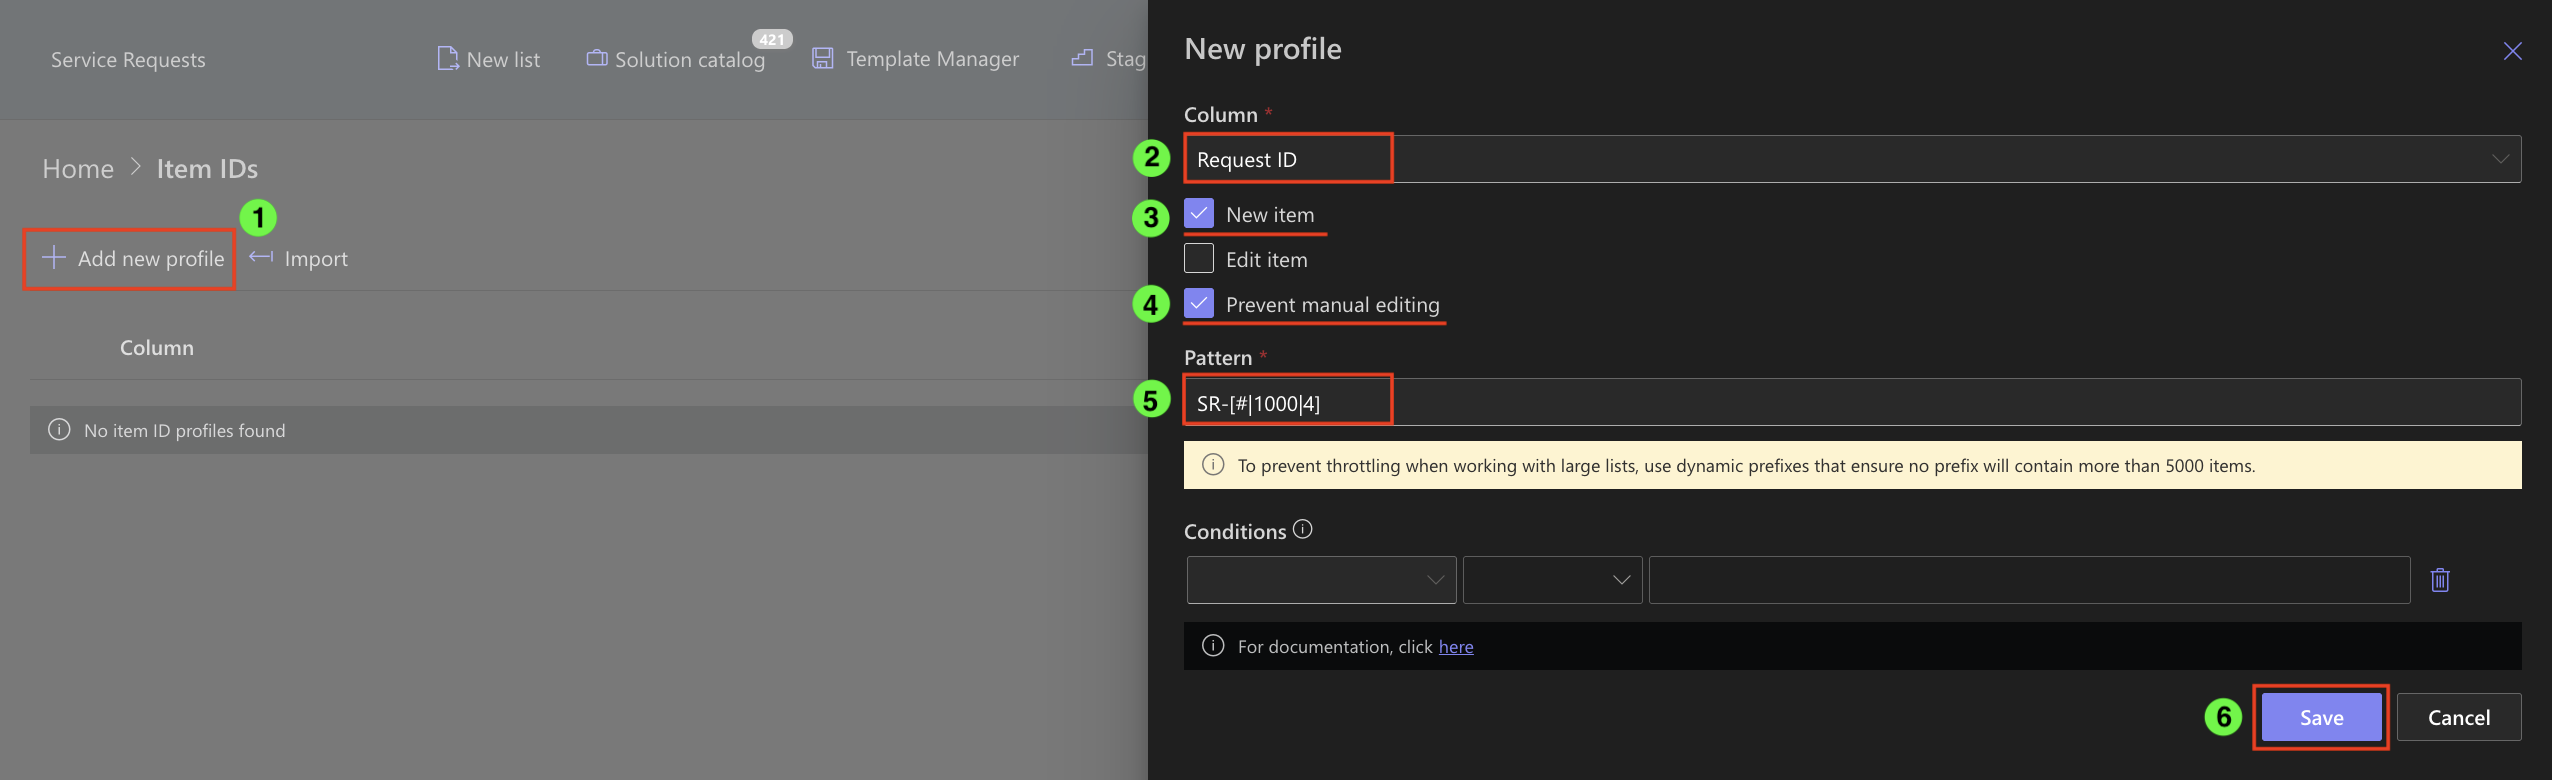
Step 4: Save & Test
- Save your configuration.
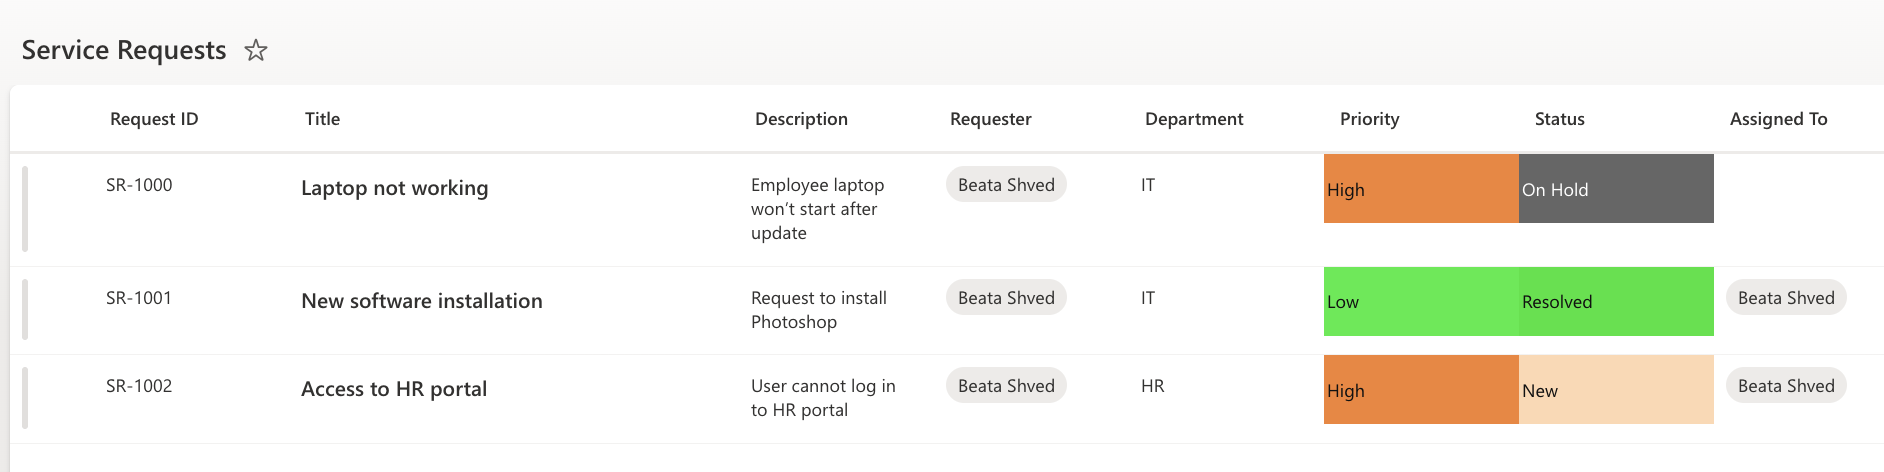
- Create a new item in the list.
- The Request ID column will automatically display SR-1000.
- Add another item → SR-1001.
Note: When running the Item ID process on a column that has no previous prefix values (the prefix if what is before the [#|n|m] the Item ID will use the seed value to start the series and all subsequent Item ID (triggered on the edit or new) with genrerate the next value in the series from the value that is stored in the ItemID process cache.
When, using the "Reset cached numerator value" option note this will remove the cached stored value and the the Item ID process will need to read all the prefix values to determine the next value to set and store the incremented value in cache.
Watch this quick video walkthrough from Infowise:
The Item ID component is a powerful yet simple way to bring structure and automation to your lists and libraries.
- IDs are automatic, consistent, and customizable.
- You can combine prefixes, counters, dates, and conditions to fit any process.
- Works in SharePoint Online and on-premises, with lists and libraries.
Whether you’re tracking requests, projects, contracts, or cases, Item IDs ensure every record is uniquely and clearly identified.