Tracking changes to SharePoint items is critical in many business scenarios. Whether you need to audit changes, capture comments, or build a changelog, a history section helps keep a clear, readable record of updates made over time.
In Infowise Ultimate Forms, you can create a dynamic History section by appending text to a dedicated column using the Update list Item action. This approach ensures that new entries are always added to the bottom (or top) of the log while preserving previous content.
Step 1: Add a History Column
- Go to your SharePoint list or library
- Add a new Multiple lines of text column
- Name it History (or similar)
- Enable Rich Text = Yes
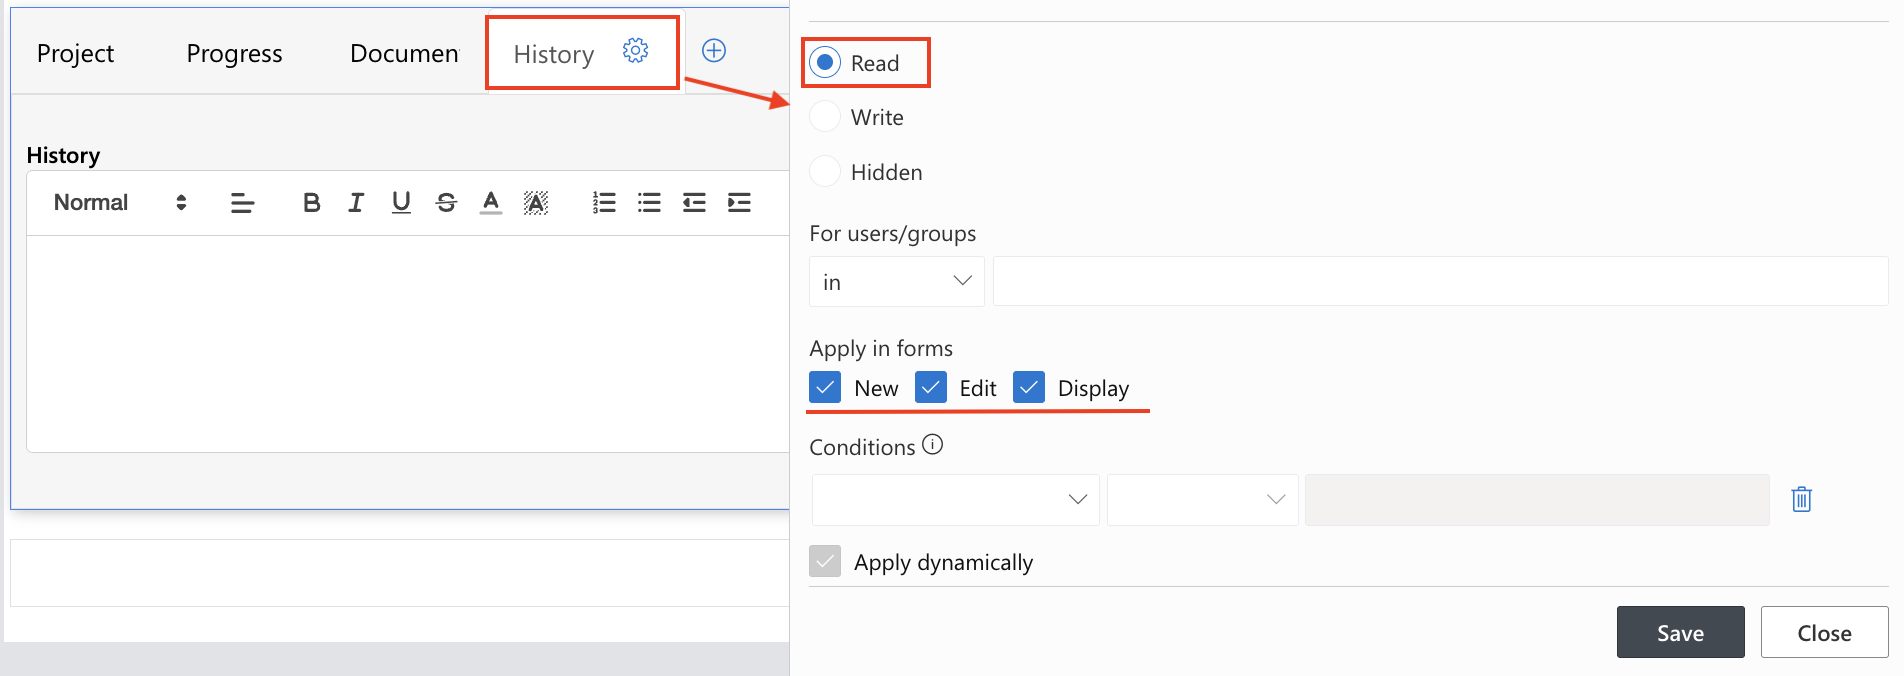
- Add a tab control in Form Designer, create a History tab, and add the newly created History column.
- Using permissions settings, set the History column as read-only.
Step 2: Create an Action to Append to the History Column
- Open Ultimate Forms for the list
- Go to Business Logic > Actions
- Click Create a New Action (type: Update list item)
- Set up the action:
- Title: Add to History
- Run On Event: Modified
Step 3: Set the Update Formula
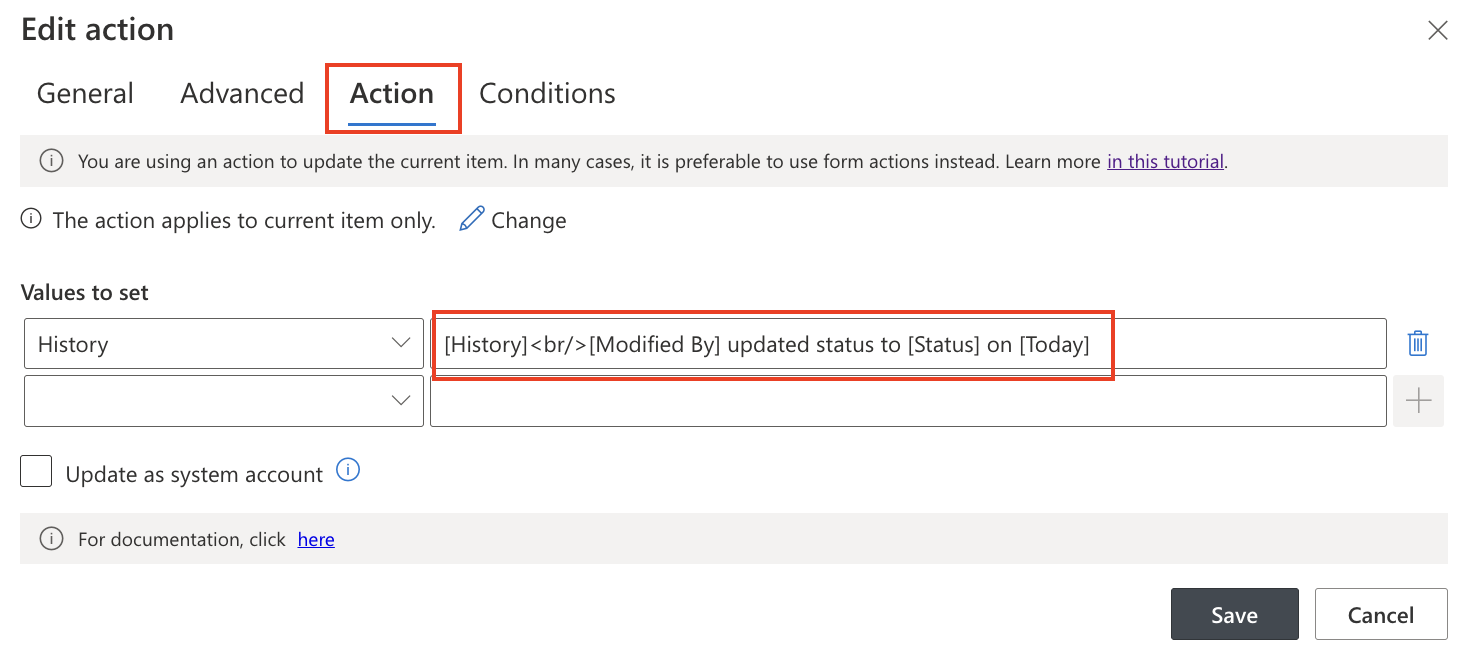
Under the Value to Set, set the update formula for the History Log column.
Example formula:
[History]<br/>[Modified By] updated status to [Status] on [Today]
This appends a new line at the bottom, preserving the previous log.
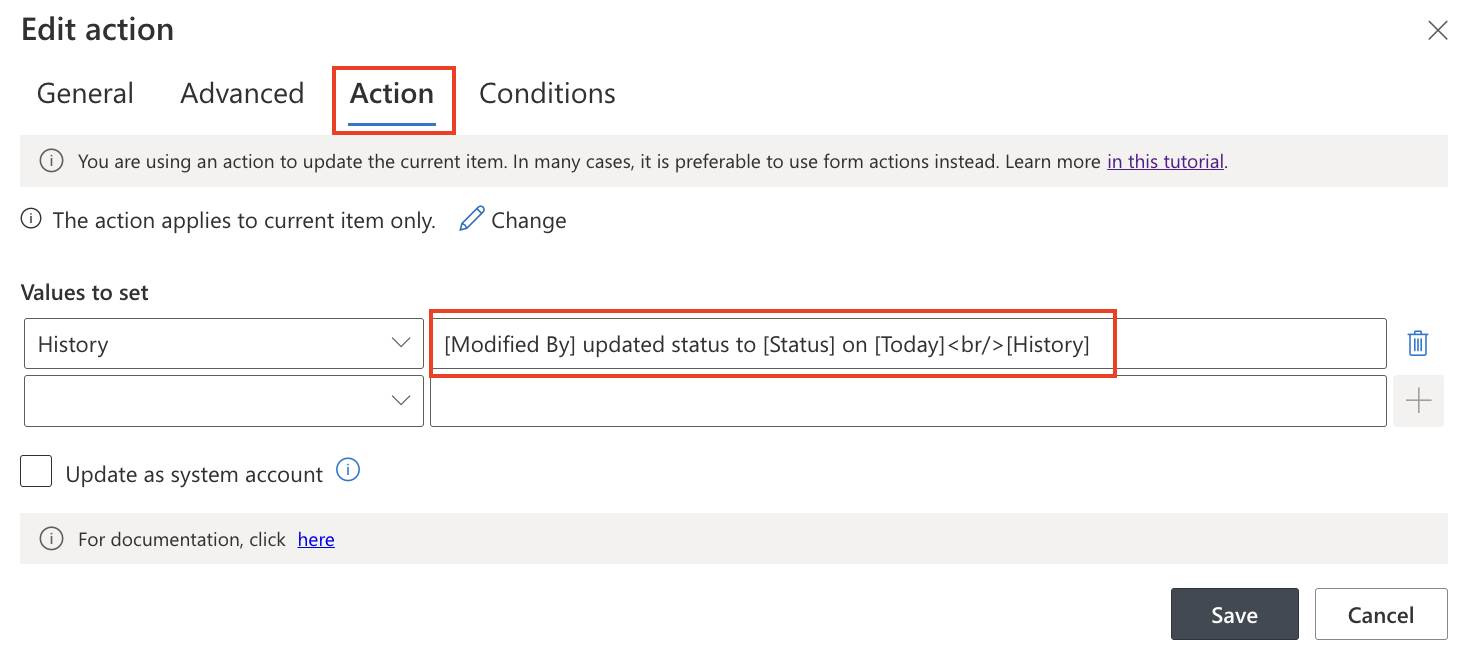
If you want to prepend the new entry at the top (most recent first), use:
[Modified By] updated status to [Status] on [Today]<br/>[History]
You can include more columns as needed, for example:
[History]<br/>[Modified By] changed Assigned To to [Assigned To] on [Today]
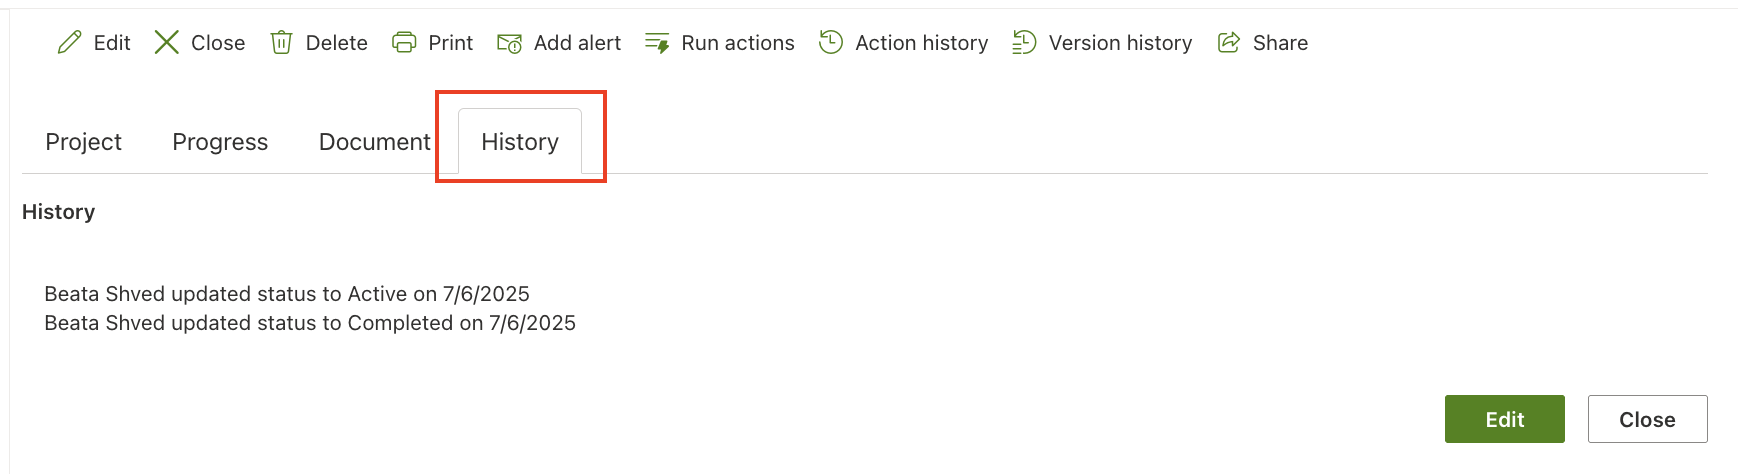
Example Use Case
A project manager wants to track when team members update the task status or reassign it to another person.
By configuring a History column and using the formula:
[History]<br/>[Modified By] changed Status to [Status] and Assigned To [Assigned To] on [Today]
…you now capture an audit trail of critical column changes directly within the list item — with no additional configuration.
This allows:
- Better transparency
- Easier troubleshooting
- Internal audit readiness
Tips & Best Practices
- Use <br/> to separate entries clearly within the text
- Use [Today] or [Modified] to include the date/time of the change
- Include [Modified By] to identify who made the update
- Use after change conditions to limit the action only to specific column updates (e.g., when Status actually changes)
- Set the column as read-only in the form UI to prevent manual edits
- Use Tabs and Layouts to show the History column in a collapsible section
A History Section is a powerful tool to track important updates on your SharePoint items. With Ultimate Forms, you can build this functionality using a simple Update List Item action that appends log entries automatically. This setup ensures transparency and helps maintain clean internal communication and tracking — without relying on external audit logs.