Introduction
In many cases we would like to interact with external data via SharePoint. This data resides in external data sources and not directly in SharePoint lists and document libraries. An example of such data could be a SQL database or a REST API.
You can work with external connection in much the same way as you work with regular SharePoint lists. You can for instance create forms for data entry. You can then place these forms on SharePoint pages, host them on external pages and even host on your external websites. With some of the data connection types you can also create Print templates and configure Import profiles. The process is very similar to the way it works in SharePoint.
We currently support the following data source types:
- Databases
- MS SQL (read/write)
- Oracle (read/write)
- MySql (read/write)
- Web services
- REST (read/write)
- SOAP (currently write only)
- Documents (stored in SharePoint document libraries or via FTP)
- Comma-delimited files (currently write only)
- Tab-delimited files (currently write only)
- Excel files (currently write only)
- Word files (currently write only)
- Email (write only)
Once you create a connection, you can define forms for the connection. Then share the New form with internal and/or external users. Or share a data view, from which you can view and edit existing items, as well as add new ones.
In this article I will guide through the process of creating such a data connection.
Configuring a REST API Connection
REST API is an industry-standard way to perform data operation via the HTTP protocol. By calling specially constructed URLs, you can view, add, update and delete items that the API provides.
For example, the root URL your REST API for handling Contacts is https://www.example.com/api/contacts. It will then expose the regular set of operations. Here we can see the HTTP method and URL endpoint for each operation:
- GET https://www.example.com/api/contacts - get list of items
- GET https://www.example.com/api/contacts/1 - get item with ID 1
- POST https://www.example.com/api/contacts - add new item
- PUT https://www.example.com/api/contacts/1 - update item with ID 1
- DELETE https://www.example.com/api/contacts/1 - delete item with ID 1
Contact item itself might have a data structure similar to the following:
- id - unique ID and primary key of the contact. This property is read-only and should not be set.
- lastName - last name (text)
- firstName - first (given) name (text)
- dob- date of birth: date
- active - boolean (yes/no)
- units - number of installed product units (number)
Properties might not be set as required by the API. Regardless you can make any and all of them required on the data connection level.
Configuring External Data Connection
- Once you open Ultimate Forms, click on External data connections under Modern forms section.
- Click on Add new profile.
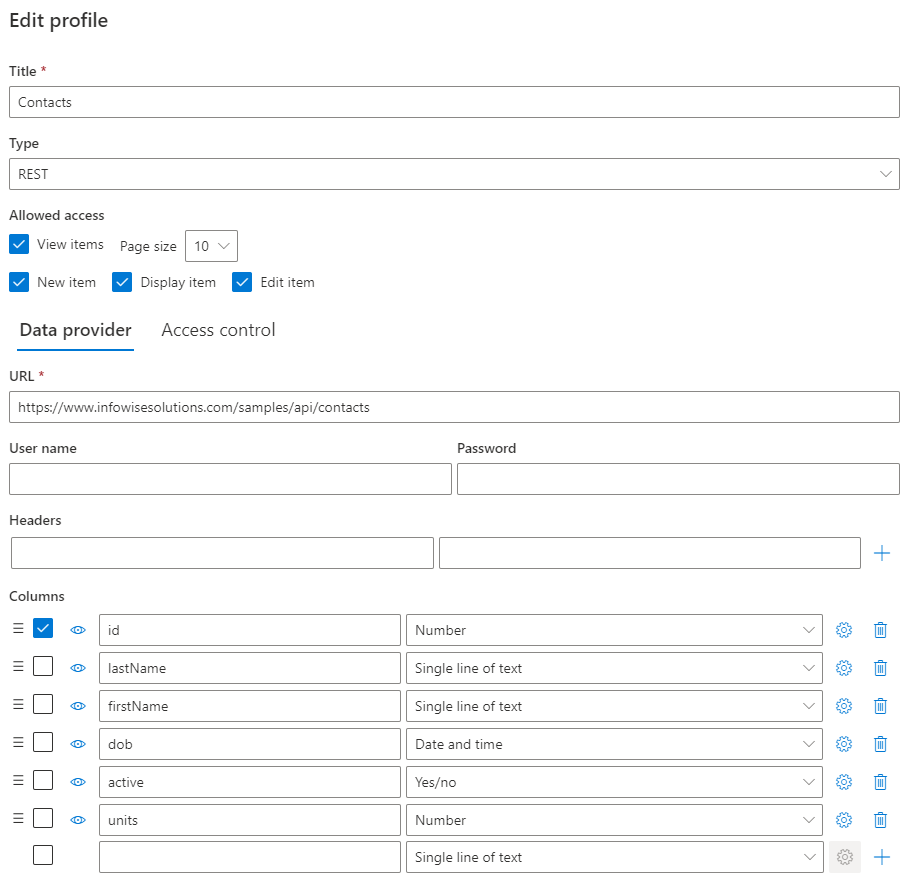
- Enter a new title for your connection. It will be used as a page title in some scenarios, so give it a meaningful title like, such as Contacts.
- Select REST under Type.
- Check all forms and views under Allowed access as we want to allow both browsing existing items as well as adding new ones.
- Enter the root URL of your REST API under URL.
- You might need to provide User name, Password or Headers if your API requires authentication
- Under Columns enter the contact item properties matching your REST API item. Note the following:
- id column needs to be marked as key (checkmark on the left of the column name).
- Match the column type with the property data type as described above, for example, lastName should be mapped to Single line of text and dob should be mapped to Date and time. Incorrect mapping of column types will cause errors when interacting with the API.
- You can change settings of every column, giving friendly title, defining columns as required, etc.
- You can mark column as visible or hidden in View by clicking on the Eye icon next to column name. It doesn't affect the visibility of columns in forms.
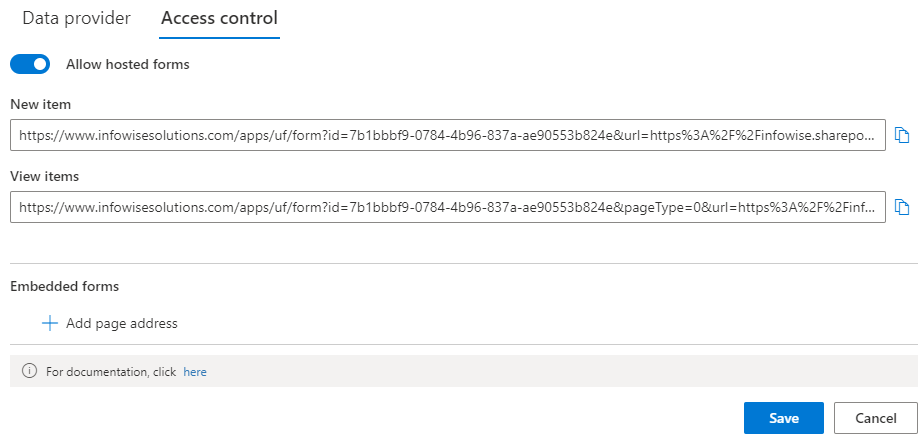
Configuring Access Control
Access control defines where and how the data connection is exposed to users. You can use your data connection in 3 ways:
- Within a web part on a SharePoint page
- On a hosted page on our site
- Embedded on your own non-SharePoint page (such as your external website).
If you are planning to use the hosted page, check Allow hosted forms. Next choose if you want to expose New and/or View (list of items), choose both options. After you save your profile, you will be able to view the actual hosted page URL here as well. If you are planing to view on a SharePoint page or embed on your own web page, enter the allowed page URL.
Configuring Forms
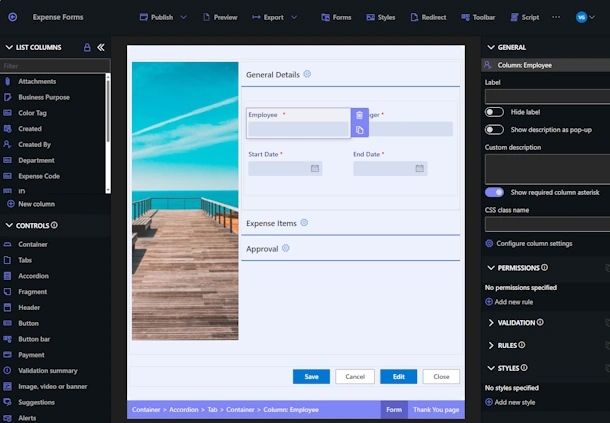
Once you've saved your profile, you can click on Design form icon to enter Form Designer. Accept the offered option of generating a form for you, it will add all columns to the form canvas. Make any adjustments you want and publish the form.

Using Your Data Connection
Edit your connection and switch to Access Control tab. Here you can copy the page URL for the View page. Open it in a new browser tab, your data connection is now ready to be used.
External data connections are an exciting and easy-to-use way of interacting with your existing data and API. They give you powerful options of integration of your data sources and 3rd party applications.
Add your comment